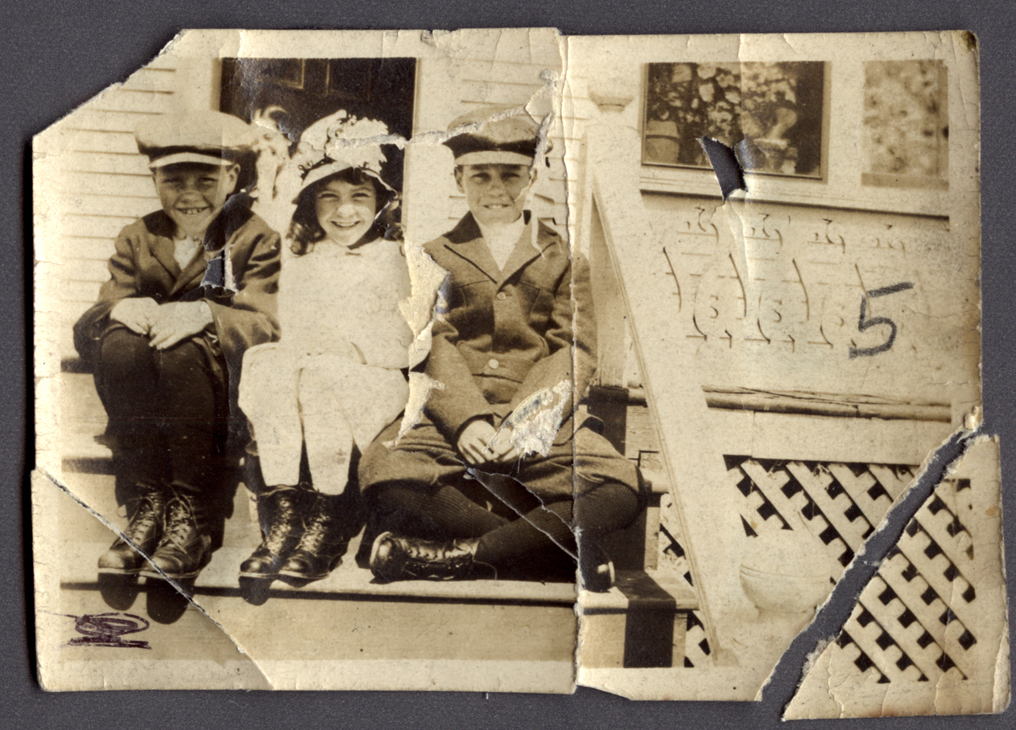
Three Kids on a Step Project
|

|
For this project, I was given the picture to the left, and I had to transform it and make it into a good condition. The first thing I did for this is I fixed the mesh on the bottom right. Then I clone stamped most of the picture so that it looked good. Then I cropped the image. I did this all in my Digital Photo class and used Photo Shop.
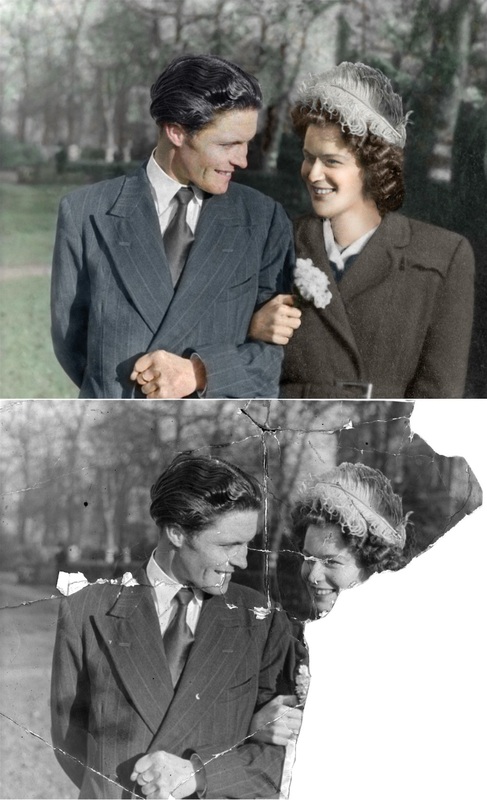
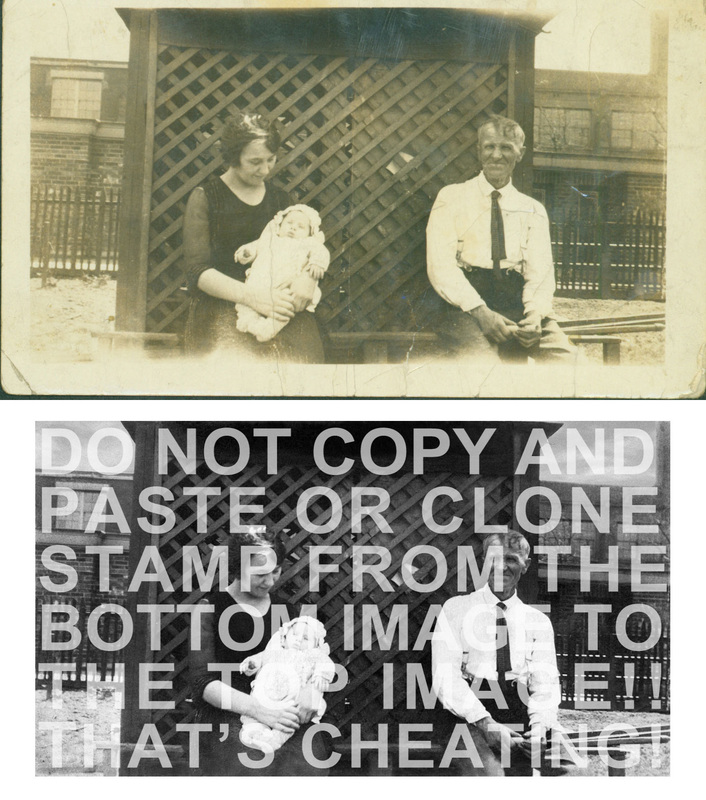
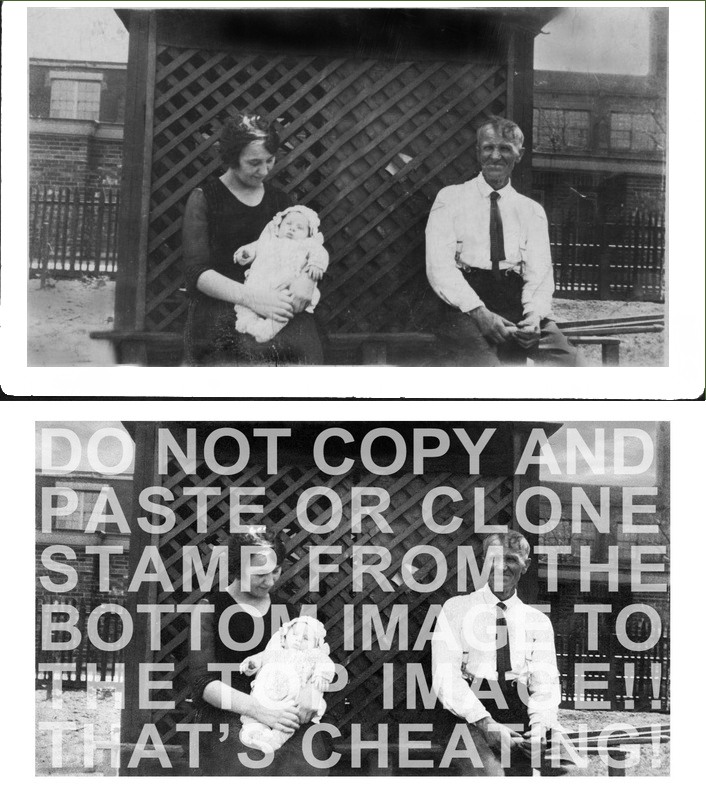
Man and Woman Project
|
|
For this project, I was given the picture to the left, and I had to transform the bottom to look like the top. First of all, I had to look online for a jacket for the woman. The second thing i did was align the jacket, and get part of a face for the woman, because I could not recreate her face. The third thing I did was clone stamp all of the missing bits and pieces. When I had completed all of this, I had to color the picture in using colors that were relatively similar to the ones of the picture above. The picture to the right is my end result. I did all of the steps in my digital photo class using Photo Shop.
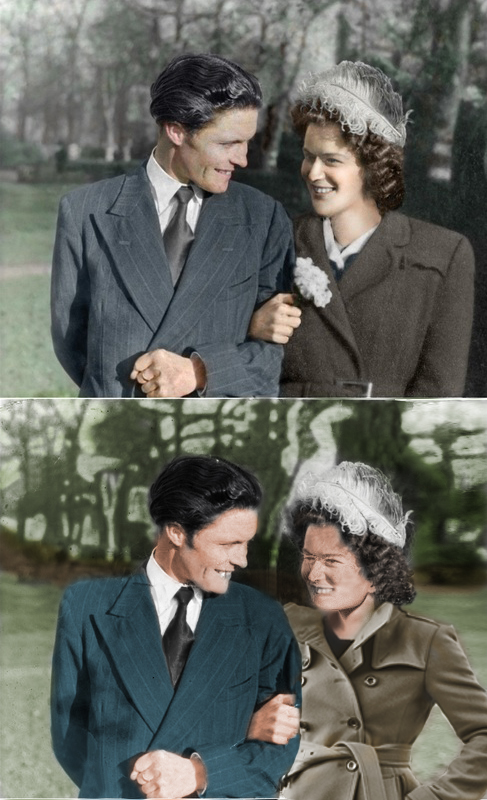
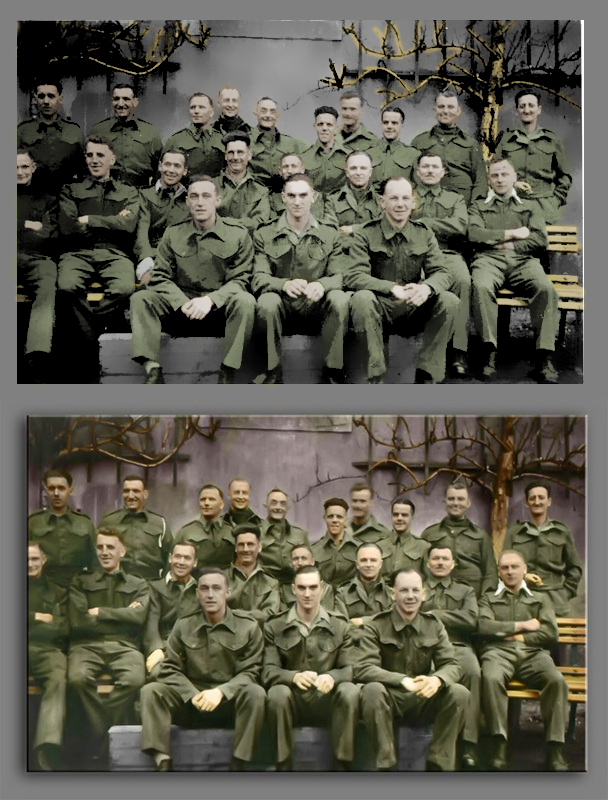
Army Barracks Project
|
|
For this project, i was given the picture to the left, and I had to make the top look like the bottom. I did this by first stamping the pen marks and creases. The second thing I did was coloring the army uniforms green, and painting the faces and hands a fresh color. Then I painted the benches a very light brown. Then I applied a surface blur so that the uniforms looked a little softer than they looked in the original picture. I did this in my digital photo class using Photo Shop
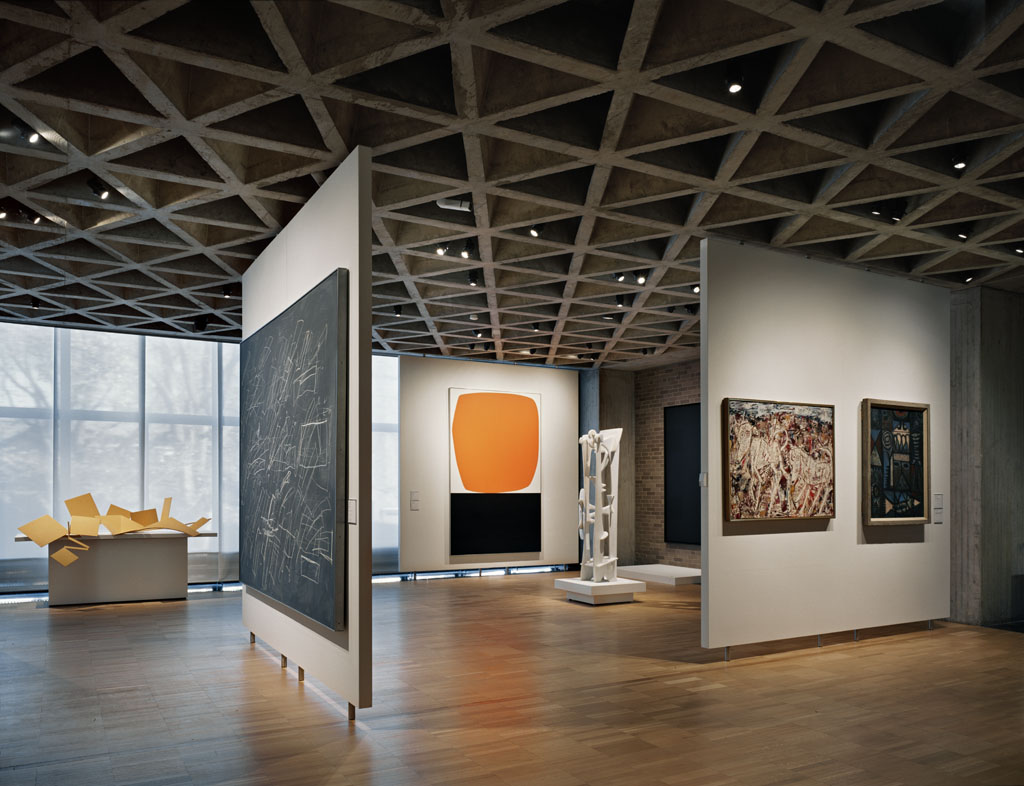
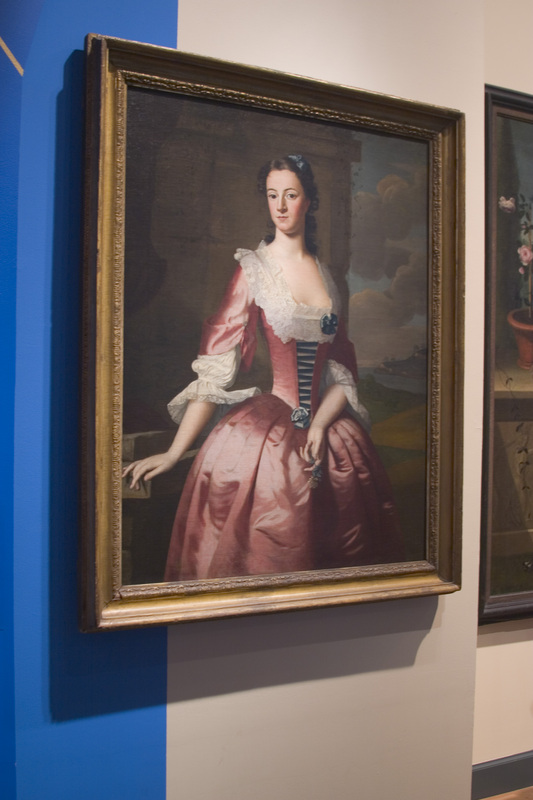
Gallery and Painting Project
|
|

For this project, I was given the top two images, and I had to put the top right image on all of the paintings in the top left image. I started out by cropping the top right image. After I had cropped that image, I proceeded in placing it over the images in the gallery. After I dragged the painting into the gallery, I resized it and skewed it so that it looks like the painting is actually on the wall. I did this 4 times until I came to the last one. I placed it on the back wall, and then I cut it so that it looked right. The bottom gallery picture is my end result. I did this in my digital photo class using Photo Shop.
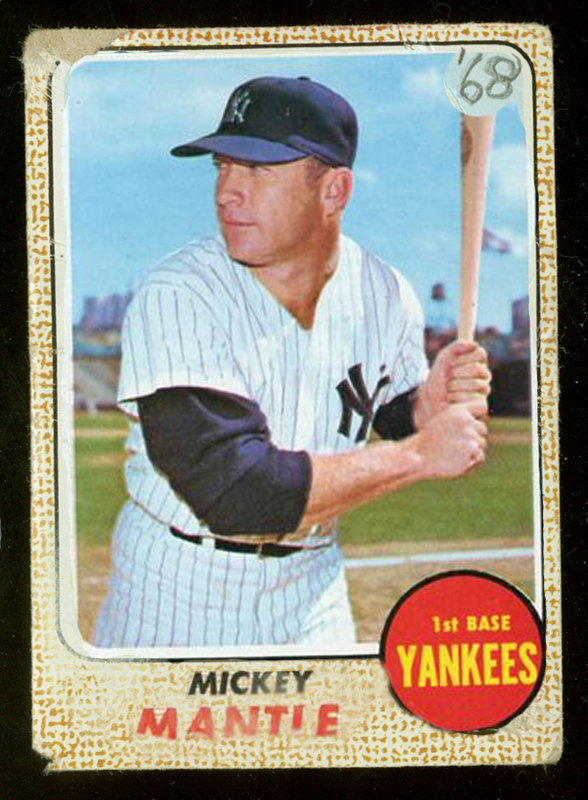
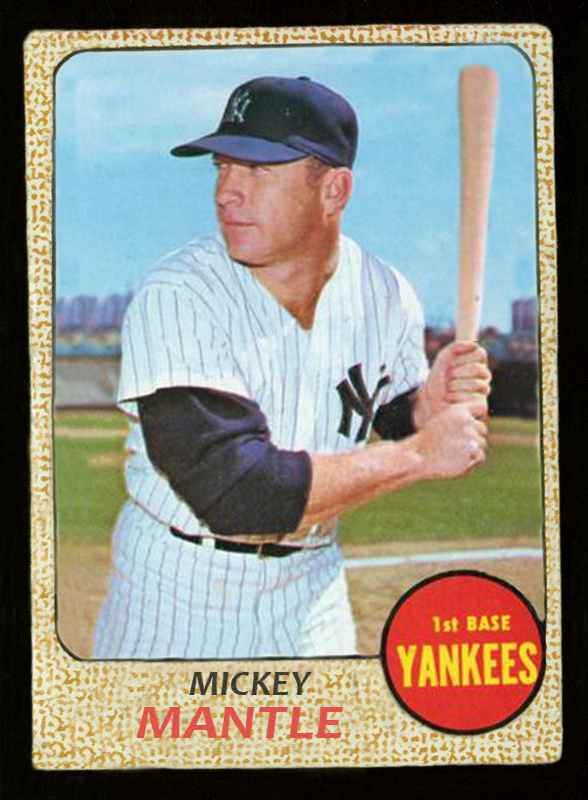
Mikey Mantle Baseball Card Project
|
|
For this project I was given the top left picture and I had to refurbish it with PhotoShop. The first thing I did was I clone stamped all of the obvious fixes. Then I copied and pasted the black line corners and the black outline of the red circle. After that I wrote Mickey Mantle in clone stamped the old Mickey Mantle. Then I clone stamped the bat so that the burn mark and the circle were gone. The finished project is the top right picture. This was done with PhotoShop in my digital photo class.
2 Adults and a Kid Project
|
|
For this project, I was given the top left picture, and I had to transform the top left top picture to the bottom, without clone stamping or copying and pasting. How I did this was I first made the picture black and white. Then I adjusted the brightness and contrast. I then selected the region I was working in. Then I used the burn tool to make the image darker in some places. I also used the clone stamp a little within the picture itself. The last thing I did was select the inverse of the selected region, and I used the dodge took to make the outside of the picture pure white. The top right picture is the finished outcome. This was done with PhotoShop in my digital photo class.
The Illusion Project
|
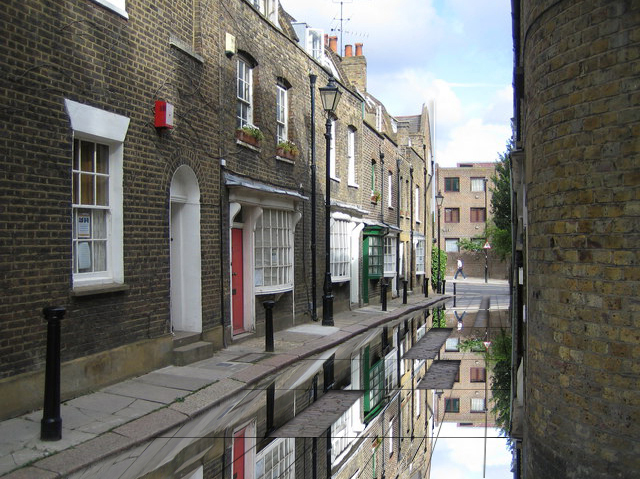
|
For this project, I started out with the top left picture. What i had to do is make a reflection that looks like a puddle of water. The first thing I did was copy and paste the building and sidewalk not including the street. Then I made a vertical reflection so that it was upside down. The I made the canvas size bigger, at 5.5 in. After I placed the two pictures under each other. Then I selected the everything from the copied picture except for the brick wall. Then I placed the selected copied image on the road of the un-copied image. Then I cropped the picture so that it would be the same size as the original. I then erased some of the picture that was covering the sidewalk side. I put black lines from one point of origin from the area near the black lamp post in the back. Then I put black selected a box on top of the street, and went to edit-stroke and made the selected area black. I did this 3 times making each of the boxes smaller and smaller. Then I erased the black lines that went over the road onto the side walk or into the brick building. Then I used the magic wand tool to select 5 of the boxes and deleted them so that you could see the original road. The last thing I did was make a shadow box around the boxes that I deleted. This was done in my digital photo class with the use of PhotoShop.
